
In post I’m going to show you how to install soffit and fascia like a pro. So, my goal is by the end of this post you can do your own project with these. This blog is all about building your own house and saving a ton of money,
So, if you see the house here behind me, we’re going to install the soffit and fascia across here and install the fascia across the top of that gable. Let’s get started.
Step 1: Installing the F Channel for Soffit Support
The first thing we need to do before we install the soffit is install what’s called F channel. F channel is what holds the soffit to the house — it’s just more or less a track it just slides into.
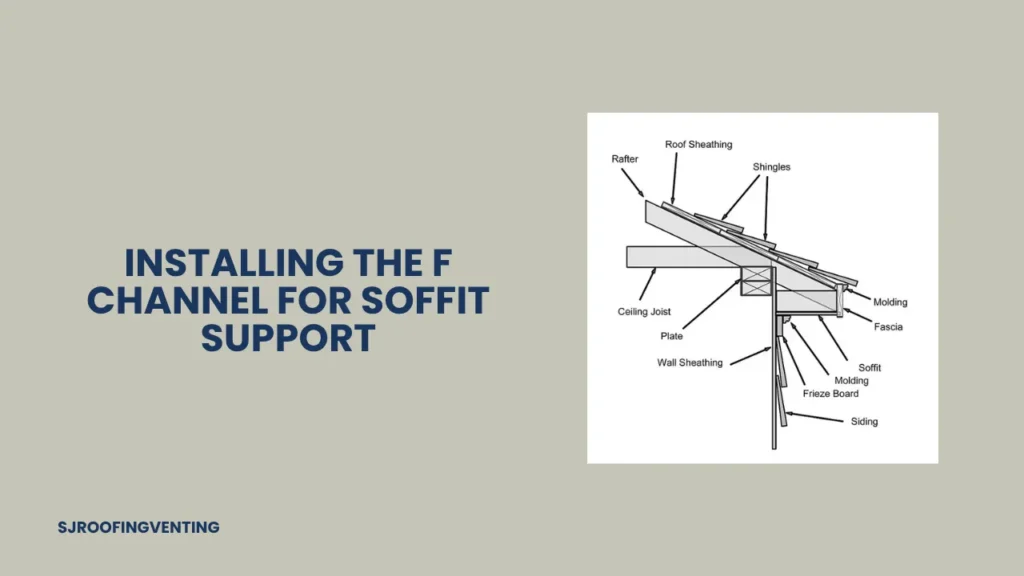
To get the height of this F channel, simply take your framing square, slide it against the house until it butts against your fascia board — boom. That tells me I’m on the same level as this fascia board. You just mark the top of your square, and that’s going to be the top of our soffit where it hits the house.
Important: The top of the soffit is going to be the top of this track — not the bottom. Mark your line, hook your chalk line to it, go down about 12 foot, and snap a line. That gives a level reference to install our F channel.
Step 2: Measuring and Cutting the Soffit Panels
To get the length for our soffit, slide your tape measure into the F channel, measure to the very end of the sub fascia. In this case, we got 12 inches. Subtract a quarter inch from your measurement — so cut the pieces at 11 and three-quarter inches.
There are three very common ways to cut the soffit:
Method 1: Framing Square and Tin Snips
Measure and mark, lay your square, and cut along the line using snips. It’s easy, but not the fastest.
Method 2: Using a Soffit Jig and Circular Saw
Blade turned backwards on the saw so it doesn’t damage the soffit. The jig holds the soffit in place, and you just run the saw down — fast and efficient. Each 12 ft sheet gives you 24 pieces.
Method 3: Sliding Miter Box
Helpful for long cuts. Turn blade backwards, use a fine trim blade. It’s less preferred by me due to setup time but works well.
I pre-cut about 24 pieces after checking consistent measurements every 10 feet down the overhang.
Step 3: Installing the Soffit Panels and Soffit Vent
To install the soffit:
One side has a nailing flange, the other an interlocking channel. Lock it in, slide it into the F channel, nail with 1¼” galvanized aluminum nails tight into the flange.
For the bathroom vent:
Use a soffit vent contraption — cut out the center of one soffit piece and slide the vent in. Cut it tightly to keep bugs out. Place a block above the soffit to nail the vent assembly to. Once installed, it gives a sleek appearance.
Step 4: Installing the Aluminum Fascia
Use 6″ ribbed aluminum fascia and aluminum trim nails.
- Slide fascia up under the roof drip edge
- Overlap previous piece by 1 inch
- Face nail in the center, every 3 ft
- At joints, add 2 nails
Only face nail where guttering will be installed. On gables, you must use a different method (no face nailing).
To finish the run, measure the remaining piece needed, cut it to 92¾”, then add 1 inch more to wrap around the bird box.
Use your speed square to mark and cut. Score deeply to snap off pieces. Bend metal using a square block to create clean edges.
Step 5: Wrapping Around the Bird Box
To wrap the bird box:
- Measure front face and underside of bird box.
- Cut and score your fascia accordingly.
- Bend it neatly to wrap around the corner.
- Install by tacking nails into the upper corners (hidden by soffit later).
- Do not nail the outer face, as the gable fascia will overlap it.
Next, install the diagonal fascia piece over the gable:
- Cut to 14 inches (or enough to overlap).
- Score, snap, and bend.
- Slide under drip edge, push tight, and nail into the soffit groove, not the face.
- Scrub a pencil mark where it overlaps, then cut and finish it off neatly.
Final Touches and Tips
- Nail final piece only after overlap is aligned.
- For extra detail: Nail into the soffit groove (not the face) to keep it flush.
- You can hide some nails under vinyl corners — stay within ½” to ¾”.
Final results:
A nice clean soffit and fascia installation over a 70-foot run. Looks sharp, holds tight against wind, and is DIY-friendly with a little planning.
Conclusion
I hope you found this video helpful. If you have any questions about this project — soffit, fascia, vents — drop them in the comments below and I’ll get back to you as soon as possible.

Hello! I’m Abdullah, a passionate professional in the field of construction and roofing. I am the proud owner of SJ Roofing & Venting, a leading construction company based in New York. With years of hands-on experience, I write about various construction methods, techniques, and industry insights to share my knowledge and help others in the field. I’m also the founder and main contributor of this website.